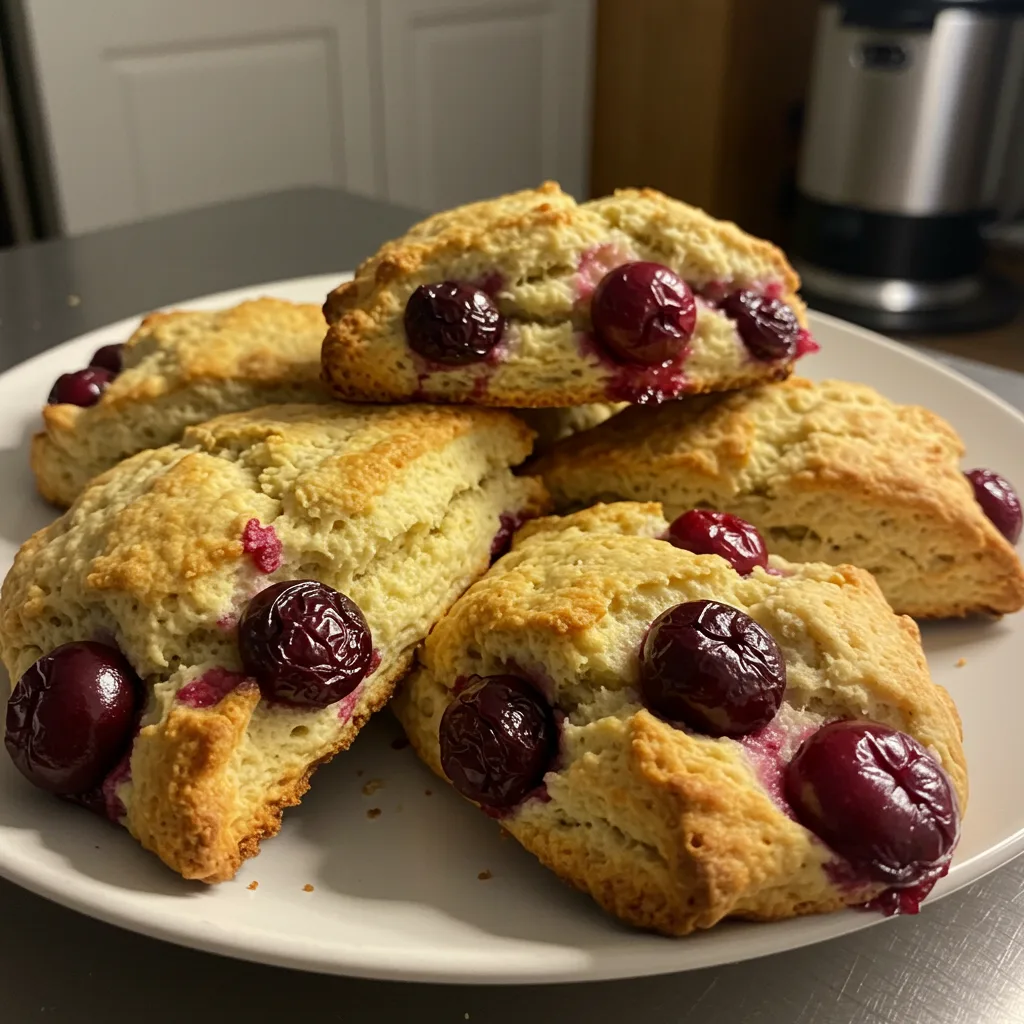
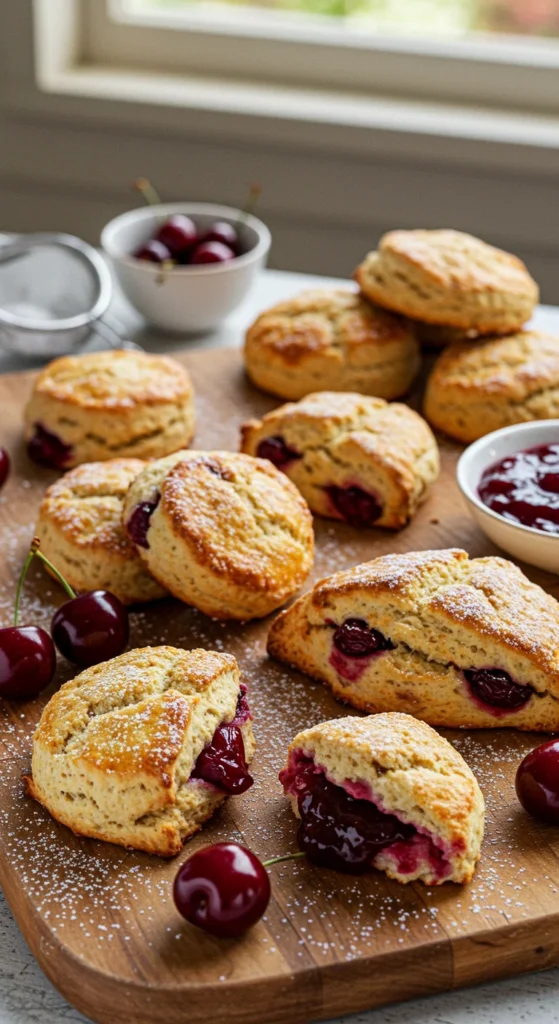
There’s something deeply comforting about a freshly baked scone—warm, buttery, and just sweet enough to feel like a treat without being overly indulgent. Now, imagine that perfect scone studded with juicy, tart cherries, their flavor bursting in every bite. That’s exactly what this Easy Cherry Scones Recipe delivers—a bakery-worthy result with minimal effort.
Whether you’re a weekend baker looking for a foolproof recipe or someone who simply craves a delightful homemade pastry with their morning coffee, these scones are the answer. They’re soft on the inside, slightly crisp on the outside, and packed with just the right balance of sweetness and tang.
Table of Contents
Why This Recipe Works Every Time:
✅ No fancy techniques – Simple steps for foolproof results.
✅ Pantry-friendly ingredients – No hard-to-find items.
✅ Customizable – Swap cherries for other fruits or add nuts for extra texture.
By the end of this guide, you’ll have a perfect batch of cherry scones ready to enjoy—whether for breakfast, brunch, or an afternoon pick-me-up. Let’s get baking!
Ingredients for Perfect Cherry Scones (Simple & Pantry-Friendly)
Great scones start with great ingredients. The beauty of this recipe lies in its simplicity—you likely have most of these items in your kitchen already. Here’s what you’ll need to create those light, flaky scones with juicy cherry pockets:
Essential Ingredients Table
| Category | Ingredient | Quantity | Key Notes |
| Dry Ingredients | All-purpose flour | 2 cups (250g) | Spoon & level for accuracy |
| Granulated sugar | ¼ cup (50g) | Adjust to taste | |
| Baking powder | 1 tbsp | Fresh for maximum rise | |
| Salt | ½ tsp | Balances sweetness | |
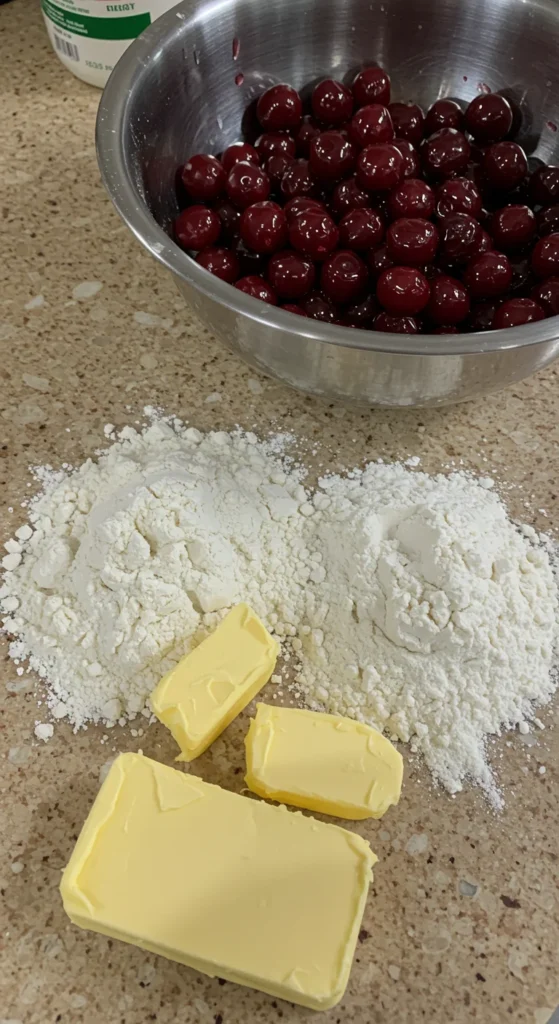
| Fat | Unsalted butter (cold) | ½ cup (113g) | Cubed, straight from fridge |
| Wet Ingredients | Heavy cream | ½ cup (120ml) | Sub whole milk if needed |
| Large egg | 1 | Room temperature | |
| Vanilla extract | 1 tsp | Pure extract recommended | |
| Mix-ins | Dried cherries | ½ cup (75g) | Or fresh pitted cherries* |
Pro Tip: If using fresh cherries, pat them dry thoroughly and reduce liquid slightly. Frozen cherries work too—no need to thaw!
Why These Ingredients Matter:
- Cold butter = flaky layers (warm butter makes dense scones)
- Precise leavening = perfect rise (check your baking powder’s freshness)
- Cream + egg combo = tender crumb without being cakey
Optional Upgrades:
- Add 1 tsp almond extract with vanilla for depth
- Sprinkle coarse sugar on top before baking for crunch
- Fold in ¼ cup white chocolate chips for extra indulgence
See the next section for step-by-step instructions to transform these simple ingredients into bakery-quality scones!
Step-by-Step Guide to Perfect Cherry Scones (With Pro Tips!)
Let’s transform those simple ingredients into golden, buttery scones with tender crumbs and juicy cherry bursts. Follow these foolproof steps for bakery-quality results every time.
1. Prep Work (The Secret to Stress-Free Baking)
✅ Preheat oven to 400°F (200°C) – A hot oven = better rise
✅ Line baking sheet with parchment paper (no sticking!)
✅ Cube butter and return to fridge until needed
✅ Whisk wet ingredients (cream, egg, vanilla) in separate bowl
“I always prep everything first—it makes the process so much smoother!”
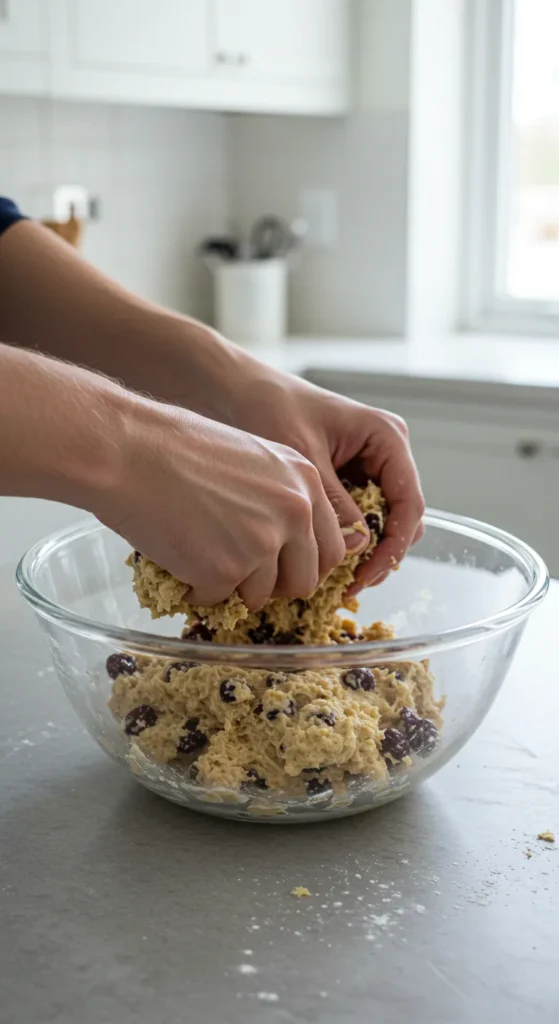
2. Mixing the Dough (Light Hands = Flaky Layers)
A. Dry Ingredients
- In large bowl, whisk together:
- 2 cups (250g) flour
- ¼ cup (50g) sugar
- 1 tbsp baking powder
- ½ tsp salt
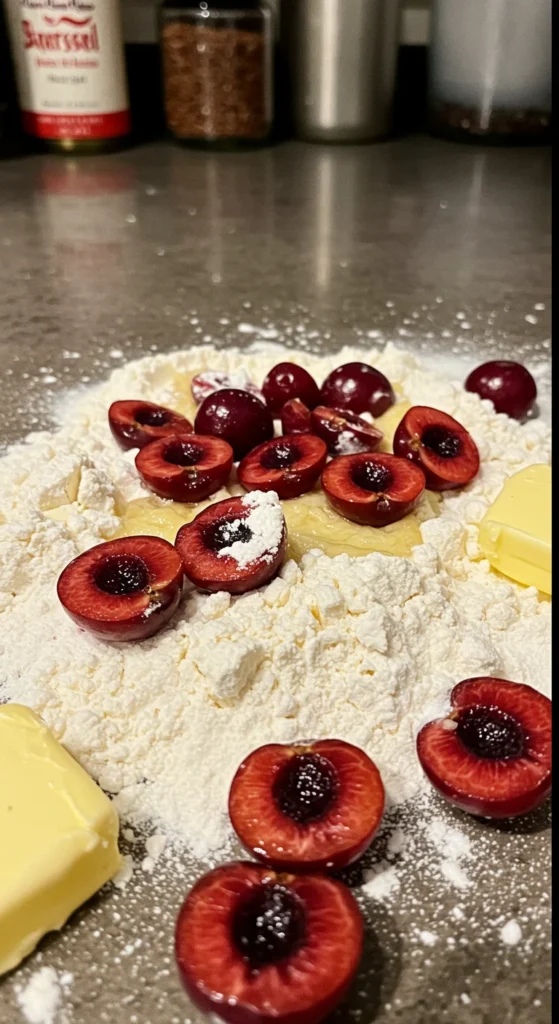
B. Cutting in Butter
- Add cold cubed butter to dry ingredients
- Use pastry cutter or fingers to work butter into flour until:
- Mixture resembles coarse crumbs with some pea-sized butter pieces
🔴 Key Tip: Visible butter chunks = flakier scones!
3. Bringing It All Together
A. Adding Wet Ingredients
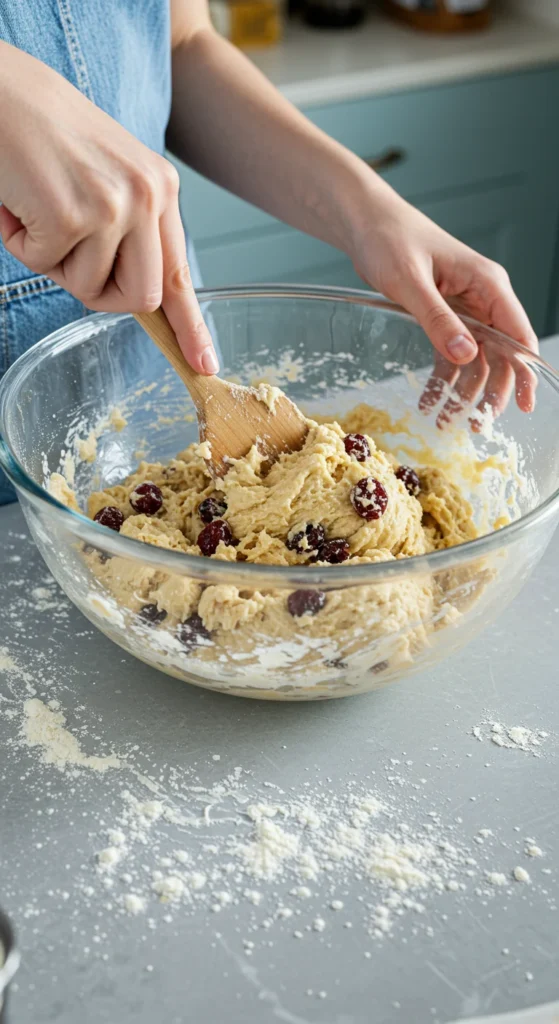
- Make well in center of dry mix
- Pour in cream mixture + add cherries
- Gently fold with spatula just until:
- Dough begins to clump together (will look shaggy!)
B. Shaping the Dough
- Turn onto lightly floured surface
- Pat into 1-inch thick circle (no rolling pin needed)
- Use sharp knife to cut into 8 wedges
🔴 Pro Move: For taller scones, chill shaped dough 10 mins before baking
4. Baking to Perfection
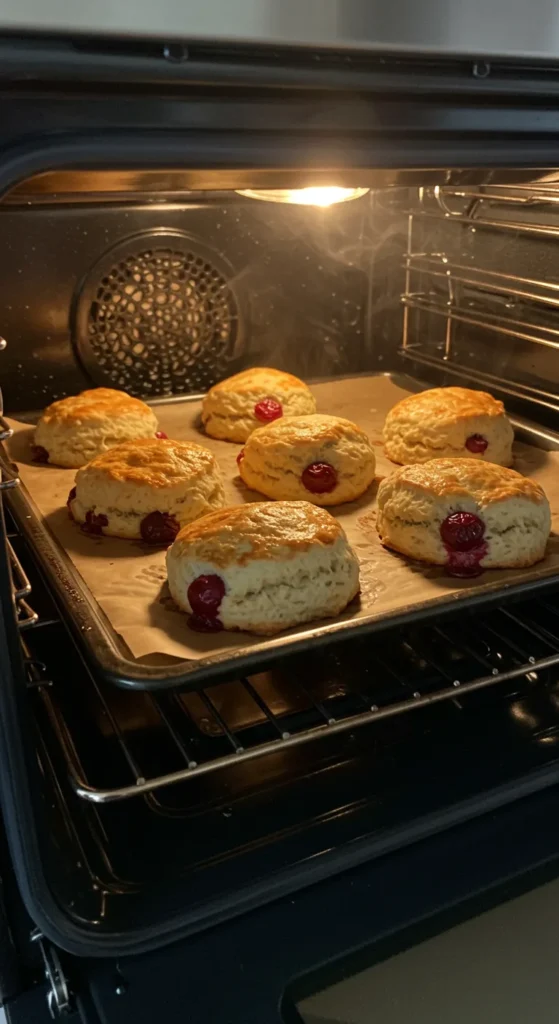
- Arrange wedges on prepared sheet
- Brush tops with extra cream
- Sprinkle with turbinado sugar (optional crunch)
- Bake 15-18 minutes until:
- Tops are golden
- Edges look set
- Toothpick comes out clean
💡 Doneness Test: Scones should sound slightly hollow when tapped!
5. Cooling & Serving
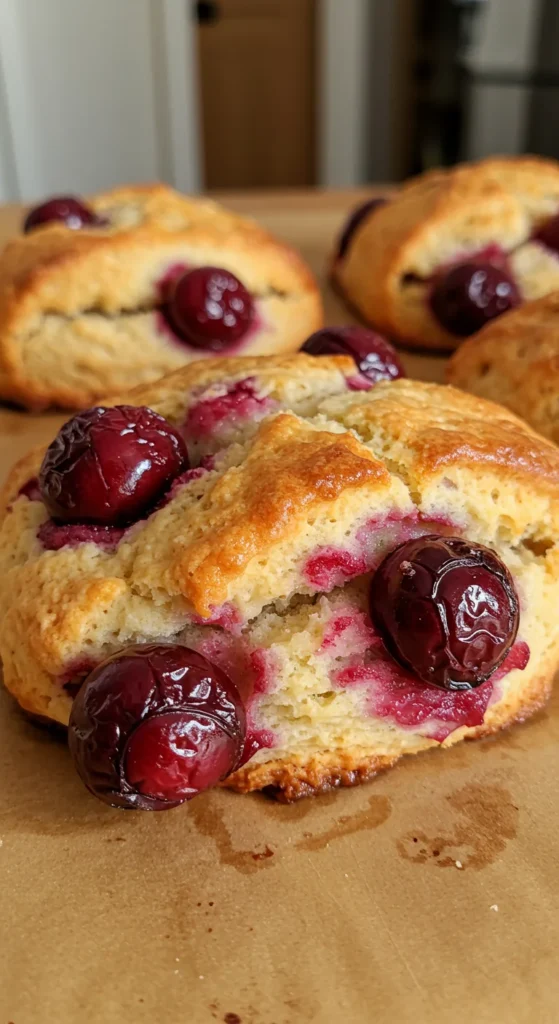
- Let cool 5 minutes on pan
- Transfer to wire rack
- Serve warm with:
- Clotted cream & jam
- Honey butter
- Or enjoy plain!
Storage Tip: *Best eaten day-of, but freeze extras for up to 1 month!*
Troubleshooting Quick Reference
| Issue | Likely Cause | Fix for Next Batch |
| Dense texture | Overworked dough | Mix until just combined |
| Spread too much | Warm butter | Freeze shaped scones 10 mins pre-bake |
| Dry scones | Overbaked | Check at 15 minutes |
Ready to bake? The heavenly aroma of these cherry scones will make the wait worthwhile! 🍒✨
👉 Next Up: Creative Variations to Try!
Chef’s Secrets for Perfect Cherry Scones Every Time
After testing this recipe dozens of times (and eating way too many scones!), I’ve perfected these can’t-fail techniques that make all the difference between good and extraordinary scones.
The Cold Factor (Your #1 Priority) ❄️
- Butter should be fridge-cold (I freeze mine for 15 minutes before using)
- Chill your mixing bowl for 10 minutes before starting
- Use ice-cold cream straight from the refrigerator
- Work quickly to prevent butter from warming up
Why it matters: Cold butter creates steam pockets during baking = those dreamy flaky layers!
Mixing Like a Pro ✋
✅ Use a pastry cutter or frozen grated butter for even distribution
✅ Stop mixing when you still see some floury spots (dough will come together while shaping)
✅ Fold cherries in last to prevent color bleeding
🔴 Biggest mistake to avoid: Overmixing creates tough scones (think “light hands, quick touches”)
Shaping for Success
- Pat don’t roll – preserves those precious butter layers
- Keep thickness at 1-inch (thinner = dry scones)
- Use a bench scraper for clean cuts without squashing edges
- Leave space between scones – they need room to puff up
Baking Science Tricks 🔥
| Desired Result | Technique |
| Higher rise | Place scones touching each other |
| Crispier edges | Bake on preheated baking stone |
| Even browning | Rotate pan halfway through baking |
| Extra shine | Brush with egg wash instead of cream |
Easy Cherry Scones – Soft, Buttery & Perfect Every Time!
Equipment
- Pastry cutter
- baking sheet
Ingredients
- 2 cups 250g all-purpose flour
- ¼ cup 50g granulated sugar
- 1 tbsp baking powder
- ½ tsp salt
- ½ cup 113g cold unsalted butter, cubed
- ½ cup 120ml heavy cream (+ extra for brushing)
- 1 large egg
- 1 tsp vanilla extract
- ½ cup 75g dried cherries (or fresh pitted cherries)
Instructions
- Preheat oven to 400°F (200°C). Line baking sheet with parchment.
- Whisk dry ingredients: flour, sugar, baking powder, and salt.
- Cut in butter until mixture resembles coarse crumbs with pea-sized bits.
- Tip: Use a pastry cutter or frozen grated butter.
- Mix wet ingredients: Whisk cream, egg, and vanilla in separate bowl.
- Combine: Add wet mix to dry ingredients. Fold in cherries until just combined.
- Don’t overmix – dough will be shaggy!
- Shape: Pat into 1-inch thick circle on floured surface. Cut into 8 wedges.
- Bake: Transfer to sheet, brush with cream, bake 15-18 mins until golden.
Notes
- Storage: Keep airtight for 2-3 days or freeze unbaked dough for 1 month.
- Substitutions: Use frozen cherries (thawed/dried) or swap ¼ cup flour for almond flour.
- For extra shine: Brush with egg wash instead of cream.
Cherry Scones Nutrition Facts (With Healthy Swaps Guide)
Let’s be honest—we don’t eat scones for their health benefits. But knowing the nutritional breakdown helps you enjoy them mindfully (and maybe sneak in some smart ingredient swaps!). Here’s what you’re getting in each delicious wedge:
Standard Recipe Nutrition (Per Scone)
| Nutrient | Amount | % Daily Value* |
| Calories | 245 | 12% |
| Total Fat | 13g | 17% |
| • Saturated Fat | 8g | 40% |
| Cholesterol | 55mg | 18% |
| Sodium | 210mg | 9% |
| Total Carbs | 29g | 11% |
| • Dietary Fiber | 1g | 4% |
| • Sugars | 10g | |
| Protein | 4g | 8% |
*Based on 2,000 calorie diet
Allergen Modifications
| Allergy | Substitution | Notes |
| Dairy-free | Coconut oil + coconut cream | May spread more |
| Gluten-free | 1:1 GF flour blend | Add ½ tsp xanthan gum |
| Egg-free | 1 tbsp ground chia + 3 tbsp water | Scones will be denser |
Fun Fact: The cherries provide small amounts of:
- Vitamin C (4% DV)
- Potassium (3% DV)
- Antioxidants
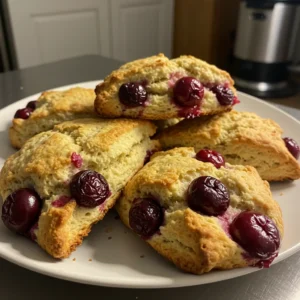
Serving & Variations (Easy Ideas to Mix It Up)
Classic Ways to Serve:
☕ With coffee or tea – The perfect pairing
🍯 Drizzled with honey – For natural sweetness
🥛 With clotted cream or jam – A traditional touch
🍦 À la mode – Warm scone + vanilla ice cream
Simple Variations to Try:
- Lemon-Cherry: Add 1 tbsp lemon zest to dough
- Almond-Cherry: Swap vanilla for almond extract
- Chocolate-Cherry: Mix in ¼ cup dark chocolate chips
- Orange-Cherry: Add 1 tbsp orange zest + orange glaze
Pro Tip: Use what you have! Fresh, frozen, or dried cherries all work well.
FAQ – Quick Cherry Scone Answers
Can I use frozen cherries?
Yes! Thaw and pat them completely dry first to avoid soggy scones.
How do I store leftovers?
Keep in an airtight container for 2-3 days. Refresh in a 300°F oven for 5 minutes.
Why didn’t my scones rise?
Your baking powder may be old, or the butter was too warm. Check expiration dates and keep ingredients cold!
More questions? Ask in the comments! 🍒
Final Thoughts – Happy Baking!
There you have it—everything you need to make perfect cherry scones with that irresistible golden crust and tender, buttery center. Whether you stick to the classic recipe or try one of the fun variations, these scones are sure to become a favorite.
Remember: Baking is meant to be joyful, so don’t stress over perfection. Even “rustic-looking” scones taste amazing!
Now, go preheat that oven and treat yourself to a warm, cherry-studded delight. ☕🍒
Tag us in your scone photos—we’d love to see your creations!
Author’s Top Recipe Pairings
While these cherry scones shine on their own, here are two of my all-time favorite recipes to complete your baking lineup:
🍪 Millie’s Cookies Recipe
If you love soft, chewy cookies, you’ll adore my copycat version of the famous Millie’s Cookies. Perfect for when you want a quicker (but equally delicious) handheld treat!
🍫 The Ultimate Pot Brownie Recipe
For those special occasions when you want to indulge, my decadent pot brownies offer the perfect balance of rich chocolate and herbal relaxation. A completely different – but equally memorable – baking experience!
Happy Baking!